Sunday, December 28, 2008

Ready for the New Year

I have just written on my Humor and Doings site that I'm working on my resolutions for the new year.  I'm examining what is working and what is not.  It is a good time to evaluate and change.  I started this blog with good intentions, but it is one of those things that must be attended to almost daily.  I have so many other things that I both need and want to do, and writing and posting hasn't been as high on my list as it should be if I'm going to keep going.  

I am giving myself permission to vacation from the need to blog.  I appreciate those who have come to visit.  I do intend to be working on my photo albums and scrapbooks.  I have a long list of items that need my attention if they are ever to be completed.  

May all have a blessed new year.
CJ

Saturday, December 13, 2008

My House Repair Album

Since my entire October was taken up with the great saga of my home repair, I decided that I must get it into a book for sharing. The home fixing up thing took over my life. It really did.

Thankfully, I did manage to find some humor in the whole event. I took pictures by the tons. My nice Master Carpenter Man grew accustomed to my snapping his picture. He just gave up and ignored me.

I purchased an 8 x 8 traditional album from Creative Memories in chocolate. I thought that nice rich brown would go well with all the pictures of Master Carpenter Man tearing up my house with saws and such. I used white pages and, of course, page protectors.

I started the album with a few pictures of Master Carpenter Man when he was working for my mother. I wanted it clear that I knew what I was getting into when I commissioned him to come make a mess in my house. I was fully aware that there would be issues of what I called 'Tim Droppings'.

I used some paper that I had purchased previously from CM and decorated the page. I even cut a few circles with the circle shape maker and think it adds a bit of interest in the border... almost like pegs in wood.


I printed my own photos for this book, so sized them smaller and also used an editing program to add some comments directly on the picture. When I thought about doing this, I have to admit that I was rather pleased with myself.

Again, I went for the simple look in decorating the pages. A bit of colored cardstock cut in triangles to give a little accent.


I even followed Master Carpenter Man into the attic and managed to bug him there. Like I said, he managed to ignore me most of the time.

I accented this page with some CM paper that I'd saved. Again, I used a triangle on one page and a random cut of paper on the other. I used some orange cardstock and cut holes with CM's Bubble shape maker. Lining the holes up so I could see them, I then used the large Square shape maker. I even saved the little dots left when I punched with the Bubble maker. Using CM's Precision Point Adhesive, I glued the little dots around the square. I rather like the look.

I've had a few friends visit since the dining and living room ceilings have been redone. I've kept this book on my coffee table in the living room. When friends look at it, they have been amazed at exactly how much work went into this whole fixing up process. They have chuckled and seem to have enjoyed looking at the pictures. I've given you just a sampling. There is more... much more.

I've enjoyed them too. I have plans to have Master Carpenter Man return to work on the kitchen. Each time I look at this album, I wonder about that. Oh, there will be more pictures and more pages added to my book.

Friday, December 12, 2008

Christmas Card

My Stampin Up friend, Crafting Ida, rallied us for a get-together to make some new cards. I love it when she does that. She teaches us new techniques and moves us along to newer card crafting heights.


This is one of my favorites from our recent class.
The mistletoe is from SU's A Cardinal Christmas. Of course, I had to order that set as liked the mistletoe very much and will use it for many other things.


I do believe the mistletoe is stamped with 'Old Olive'. Ida kept us busy with the ornament as used embossing for the gold, then glue and glitter for the eye popping color.

I have to confess that as hard as we tried, I do believe we left glitter behind to be spread throughout the home of our lovely hostess. Kids of all ages... even ours... can be deadly with glitter. I'm glad it wasn't at my house. I also remember why I didn't use glitter for my art projects when still teaching fourth grade.

I realize that the public expects full details as to how to make items that are shown on blogs. I'm looking for the stamp set name for the ornament. I'm sure as soon as Ida sees this, she will be e-mailing me. I, of course, will amend my instructions to include that pertinent information. Tah Dah.

Crafting Ida taught us to make a bow. This I'm going to do in another post. I'll need to get out the camera and do a step at a time. It will make more sense. I just wonder why that secret was lost on me before now.

Stuff Going On

I have a confession. I realize that I've not posted for awhile. I can't promise an everyday posting. I admire those who have their daily lives disciplined to include all those important things. I just can't seem to get it all together. Sometimes I rebel.

This past August, I signed up to be an independent Creative Memories consultant. The policy of the company kept me from being too verbal about it. They have guidelines, and posting on blog sites about all of it wasn't permitted at the time. However, the company has revised their guidelines, and I am now able to be more up front on my blog space about what I'm doing.

I've told you before that I'm into scrapbooking. It really is all about preserving memories and telling stories. I plan to be back and let you know what I'm doing.
I will be back with pictures, etc. soon.... Really... I will.

Monday, September 29, 2008

Fan Blade Recycle

I-Needa is a painting madwoman. I'm a little afraid to visit her now as she tends to paint anything standing still and in sight. It makes me fear, as don't want to wake up in the morning with pumpkins or sunflowers painted down my arms. Surely she isn't that bad yet! At some point, she may need an intervention.

I-Needa is obsessive compulsive... sorta. So am I. She comes by it honestly. We don't wade into new territory. No, we plunge in headfirst and go at things with reckless abandon. When that wears off, we are on to new frontiers.

Actually, I'm green with envy on this new endeavor. I've always wanted to get into this painting stuff. I-Needa is fortunate to have Mrs. Paints Beautifully two doors away. Some of the neighbors are getting together frequently to paint. I believe it all started with painting flower pots. For I-Needa, it has grown into a full time passion. (I can't wait to see what I get for Christmas! I'll bet it's a painted something.)

I do think this fan blade is cute. She put it by her front door, and it certainly welcomes in the fall season. It is just a happy little thing, and I know I-Needa is proud of her newest work of art.

Thursday, September 18, 2008

The Craft Fairy Visit

This isn't the first time I've mentioned I-Needa's new passion. She is into craft painting... bigtime. Today she sent me an email with pictures of what happened when the Craft Fairy visited. Please note that this stash of fairy loot is spread all over 'my' guestroom bed. I guess I won't be visiting for awhile.

Also note the wonderful spiny thing and guess what it will be holding soon. Alas... I-Needa will have something to organize her paint bottles into. Of course, that will be in 'my' closet. The guestroom closet was taken over for crafts from the very beginning. It assures that no guest can bring many clothes. Just kidding.

I will add that I-Needa has always been a giving person. She really does love sharing things, and I think it is wonderful to see how others share with her as well. One Man's Trash truly is Another Man's Treasure.

In this case the saying should be: One crafters attempt to clean the closet is another crafters delight to receive. Oops.. I forgot this was about the Craft Fairy. To be quite honest here, the generous soul is a friend of Mrs. Paints Beautifully.

In the meantime, I-Needa has blessed me with using her CM shape makers as she is busy painting. We just trade our stuff around . It works for both of us at times.

Wednesday, September 10, 2008

More Painting

I-Needa is still in full tilt experimenting with painting. She has worked and worked on this and says it still needs something. She thinks she has figured out what she wants to do to 'fix' it, but I think she is doing really well for just starting... or even for just doing.

I think I might be safe in getting her a Christmas gift certificate to Hobby Lobby again this year. I'm sure paint, canvas, and frames are going to be in her future for awhile.

Saturday, August 30, 2008

I'Needa's Painting

I'Needa has been up to her nose in paint during her free time. She recently took up learning to paint, and this is her recent piece. She had a good time doing it, and decided to put it in a frame on her wall.

Her neighbor, Mrs. Paints Beautifully, is really having fun with her new artist. It's wonderful to have someone to teach you the shortcuts when you are just getting your feet wet learning a new thing.

I'm certain that I'Needa is going to enjoy working with acrylics and hope she sticks with it and develops her talent. I'm rather envious of the fact that she has a teacher and can do this. They have Saturday get-togethers to paint, and I-Needa is certainly having a great time. I think Mrs. Paints Beautifully is enjoying sharing her talent and helping to pass on her art.

Monday, August 11, 2008

I-Needa Is Painting

Daughter I-Needa has been to Mrs. Paints Beautifully's house to have another painting lesson. She is trying to learn to float paint. Just in case you are wondering.... I know you aren't, but just in case... these are lovely little fluffy sheep and some harvest pumpkins. I-Needa has been having such fun and I have to admit that I'm a tad envious.

I've always wanted to paint. I had a few lessons several years ago, but the instructor was from out of town and ended up not being able to continue classes do to a health problem. I was sad at the time that the lessons were over, and two or three lessons just wasn't enough to really master anything. I'm really happy that I-Needa has someone who can teach her technique, etc.

I'm going to visit I-Needa shortly and have some nice things to haul to her in the way of supplies. I'm sure I'll find a few things to bring home as well. We trade. Lovely, really.

Friday, August 8, 2008

Neck Tie Quilt

Daughter I-Needa decided to send me this picture of the full quilt. This is the quilt Mother made a number of years ago. She searched every garage sale and gathered a sack or two of men's neckties. Then she made all these little squares and sewed them together for a quilt. She said it was really hard as all the ties are cut on the bias and you have to work with that when sewing them together.


She also made shams for the pillows, and sawtooth edging in white. It is a happy looking quilt.

You can click on the photo and get an even closer look at the quilt. Of course, you knew that.

Thursday, August 7, 2008

Tea Towel Time

I-Needa was at Mrs. Paints Beautifully's house the other day as they were painting on tea towels. My! This brings back memories.

I'm afraid my towels are now purchased complete with decorations, but I do remember the time when fussing up plain white cloths to use around the kitchen was the 'in thing' to do. You may... or may not... remember all the towels embroidered with names of the days of the week. There were pictures of washing for Monday, ironing for Tuesday, etc. I have no idea where they have gone.

I-Needa said that there is more she is going to paint on her towel, she just didn't have time.

For you quilters, this quilt used as a bedspread was one my mother made years ago. It is all from men's neckties. She said it was a dickens to make as ties are all cut on the bias, which made working with them lots of fun... in a challenge sort of way. The fabrics give a rich look to the quilt, and she received many complements on it as it sat on her antique walnut bed. I-Needa was blessed with it a few years ago.

Just in case you wonder what I'm doing, I'll confess that I'm doing a little of this and that. I have been working with scanning photos, and I'm also trying to clean the guest bedroom closet. I don't think the two are related.

Tuesday, August 5, 2008

Gift For I-Needa

I wish I could paint like this!!!

I-Needa has a neighbor who has quite an artistic talent. I had the privilege of getting a tour of her home with all the nifty things she has created.

Mrs. Paints Beautifully has taken several of the neighbors under her wings and is helping them learn to paint. I'm sure something like this takes a bit of practice!
School is about to start, and Mrs. Paints Beautifully surprised I-Needa with this lovely little writing desk box all decked out in back to school art.

The top picture is the outside lid of the box. The inside is shown in the bottom picture. I-Needa was thrilled at the lovely surprise, and she will certainly enjoy this painted box.

If you are a quilt person looking at this picture, you might enjoy knowing that the quilt is one my mother made several years ago. It is a very happy quilt.

Sunday, August 3, 2008

Think

I-Needa sent me a picture of the letters she painted yesterday which will hang in her elementary classroom. The inspiration came from her high school years seeing a sign with black lettering hanging above the board in her algebra teacher's room. I-Needa reported that the whole class hated that sign.

Now, as a teacher, I-Needa has more of an appreciation for the reasoning behind that sign. She decided the other day to use it in her classroom.

She purchased the letters on 'big time' sale at Michael's and painted them with acrylic paint. The letters are lightweight wood. They are a good size, but not large. Placed on this white place mat, you can have an idea of size. I-Needa used a stylus to place the dots on the letters. I think they are really happy looking and hope her kids will appreciate them and the meaning behind them.

Thursday, July 31, 2008

Taking the Red Out

I've torn myself away from playing with layers, and I've started trying to recover some of the old photos. The top photo is one taken of Right Back many many years ago. His grandmother had this photo in an album that wasn't photo safe. There may have been other factors as well that caused the picture to take on a reddish cast. I will admit that the house was a pale pink, but not that pink.


I'd scanned this top photo some time ago with my HP all-in-one. I think it did a pretty good job of scanning, but there wasn't any way for me to really fix the color problem.


I retrieved the original photo from its resting place and scanned it again with the Epson photo scanner.

I clicked on customize when the window popped up, and I clicked for it to adjust color.

I then opened it in Photo Shop Elements and did another automatic color adjustment.

I'm thinking that the second photo would be far nicer in an album, and I feel I have that precious moment back again.

I'm seeing all kinds of possibilities here!

Wednesday, July 30, 2008

Playing With Photo Shop Elements

I've certainly strayed from card making lately, but I just may have found what I want to do when I grow up. I want to play with graphics!!! Oh, wait! I am grown up, and I am playing with this new toy. I just LOVE learning new things.

Last night I decided that I'd best get into the tutorials that come in Adobe Photo Shop Elements. It certainly beats trying to figure everything out by myself.

I've always wondered how people took photographs and changed their content moving things from one picture to another. After the tutorial.... I knew! It is about making layers.

This photograph was taken in I-Needa's yard close to her front door. I opened that in Photo Shop Elements and used it as a background layer. Not long ago, I-Needa decided to take up painting. Her first project was a mushroom. Her second was this frog. She had sent me photos of each of these items separately.

I opened the mushroom (brought it into Elements) and pulled it on top of the yard photo. Then I erased the background from the mushroom picture with a background eraser. I then had the mushroom showing in her yard. I used a move tool to position the mushroom, and a sizing tool to get it the size I wanted.

I then opened the frog picture into Elements and pulled it on top of the yard photo. Then I erased the background with a little background eraser. Again, using the move and sizing tools, I worked until I was satisfied with the look. Then I used a flatten image command followed by saving the photo.

No! I am not ready yet to take pictures and try to teach Photo Shop Elements. I'm a very very beginner. I have to tell you.... this is fun... way fun... totally cool... I see new things on the horizon.

Monday, July 28, 2008

Working With Photos

Today I purchased and set up this new photo scanner which I purchased from Staples. It is an Epson Perfection V500 Photo scanner. It came with scanner software bundled with Adobe Photo Shop Elements.

Why, oh why, am I getting involved with this? It is something that seems to be growing bigger by the day. It started as a simple desire to copy and repair some of the old family photos so that they could be preserved in either a book or scrapbook form.

I quickly found out that my regular all-in-one HP printer/scanner/copier just wasn't up to the task. Don't get me wrong... I use the dickens out of that piece of equipment. I just found that a dedicated photo scanner would produce a higher quality and do more for the photos.

I'm now at square one learning how to use Adobe Photo Shop Elements. I've messed around before with 'Paint', but this is a much bigger program, and it is going to take some doing on my part to develop some self taught skills.

While I may be a tad in awe of this whole undertaking that I've managed to commit myself to doing, I do think it will be fun. I'm going to be using lots of problem solving skills and exercising my brain but good!

I've spent a good portion of the afternoon just messing around with Photo Shop and reading what I can in the instruction portion of the software. I long for the good old days of a nice written manual that you can hold in your hands and take with you to study. Somehow, I just don't want to run off the fifty some pages on my printer.

I'm going to have to do some serious organizing in my head about how to scan and organize the pictures in the computer so I can find them easily. There will be a lot of pictures.

I've about had it for today, so will try to clear the cobwebs out of my brain and come back for another round tomorrow.

Sunday, July 20, 2008

For A Gift Card

Last night I needed to get busy and make a card to use today. I'm headed to a bridal shower this afternoon. I can't believe that I waited until the last minute to start on a card, but I did. I've got to stop that!

I rummaged through my stamps and decided on a stamp from SU's Sassy Stems. I used my Creative Memories cutting system to cut out the oval.

The inks and papers are from SU's Soft Subtle collection. The saying is from SU's 'So Many Sayings' stamps. I punched the saying with SU's Word Windows punch.

With texture from Cuttlebug's polka dot folder and some ribbon that I picked up at Hobby Lobby on 1/2 price sale (LOVE those sales!) I finished the outside of the card.

I must say that I was happy that I-Needa had tried to tell me about making a bow on cards. I'd listened to her last week talking about making bows. I'm a visual, and following it was a bit difficult. However, I'd gotten the idea that you take a nice length of ribbon, cut it in the middle, then put it on and tie it. I used narrow double sided sticky tape to secure the ribbon in place from the edges to the middle. Then I took the ribbon, which has a fine wire on the edges, and simply looped it once and gave it a little twist. I'm thinking that with ribbon with regular edges, I'd have to loop it again. I'm going to have to practice this bow making.

I'd purchased a gift card and needed something to dress it up. I decided to write a little poem about using the gift card, so included it on the inside. I printed it on my printer and cut it to size to fit inside the holder I'd made. (If you want to read the poem, you can click on the picture and enlarge it)

I'd taken the pink sheet and punched the corners with a corner punch from EK Success.

I added a pocket on the left to hold the gift card.

Saturday, July 19, 2008

Added Information

It was nice to hear from my consultant yesterday. She did want me to know that that Power Sort Box sitting on her table would hold 2,400 photos! I was shocked! That's a lot of photos!

She also mentioned something very practical that I'd not thought to say. 'Even if you never expect to create an album of your photos...labeling and sorting them would be the kind thing to do for future generations.' Well said, CM Consultant!

Actually, she left some helpful suggestions in her comment on my Sorting Pictures post. I know you can't see the comments unless you click on the little envelope on the lower right hand side of the post. It says 'comments', and if you just click there, it will open up and you can see everything she said. She is SO smart and you might want to see what she has to say. The woman lives and breathes this whole preserving memories thing, and she has been doing it long enough that she really knows what she is talking about. I hope you take the time to see what she has to say. If not, I'm sorry.

Friday, July 18, 2008

Sorting Pictures

You are probably wondering if you are going to get to view yet another table full of my mess as I work on my trip to Michigan. Really, I'm not that cruel. My mess is mounting, but my book is also growing. I'm going to start page 35 today, and I'm really liking the way it is turning out.

This is a picture I couldn't resist adding as it was sent to me by my Creative Memories consultant. She happened to mention that it was her mess. No way! That does not at all qualify as a mess. This is organization at work.


The feature item here should be that nifty sort box. It is a place to start with photo organizing. The box itself is approved as photo safe, which really should be a concern. It certainly is a large step above throwing photos into a drawer, which was my method for far too many years.

Thinking ahead as to photo order when preparing to start an album seems a basic must to me. I made an album of my two children when they were little, and I had one section for I-Needa with pictures entered from youngest to oldest. Then I started another section for Right Back, again with pictures progressing in age.

My Michigan trip photos are arranged by travel days. I've also labeled each new day and made a little note about what we expected to do on that day. I have to remember to include enough information that it will make sense to me twenty years down the road.

If you are reading this and thinking about a drawer full of jumbled photos in your own home, I might casually mention that you paste a sticky note somewhere concerning future organizing. Start by getting a container that is photo friendly. Make sure it is truly photo safe! A sort box might be a great place to start.

It is time to get back to my own album making. Therefore, I leave you with the challenge to do something to preserve your photos. If they were important enough to keep, they are important enough to preserve safely.

Thursday, July 17, 2008

Working on Album

I understand that this photo will not win any awards. However... that is NOT the point here. I just want you to know that I'm really hard at work on my Michigan trip album. The last two days, I've completed 34 pages, which isn't bad. I'll be working on it again today.

I will just say, for those who might be mildly interested, that putting together a photo album, or scrapbook, whatever you chose to call it, doesn't have to be elaborate to be nice. For me, it is about having enough information to recall the trip years from now. I also want it to look pleasing on the page.

I am using a Creative Memories 12 x 12 true coverset with white pages and protectors. The true sets are new. CM has added just enough page area that the usable space on the page is a true 12 inches. That is nice as 12 inch decorations will fit in either direction. It also gives a little more room for photos.

I had most of my photos printed this year. Some I have printed on my own computer. The nice thing about printing them myself is the fact that I can print them in smaller sizes if I choose and fit more on the page. The nice thing about having them printed is that I don't have to print them myself. It is costly to print pictures on a printer... ink...paper. Therefore, I've probably saved a little money by having most of them printed.

I'm a firm believer that simple is good. I have organized my album by days. Each day of the vacation is highlighted by different colors of accent paper. I have lots of photos and have used just a touch of color on each page. A little corner piece or a thin strip of paper along the side gives it a little interest, but it isn't overdone. Again, I'm using CM paper as know it is acid and lignin free. That is important in the long haul as I want my albums to stay nice for many years.

I took pictures of signs, when appropriate. I just cut around those signs and put them by the pictures. It certainly is faster and easier than trying to write all that information. Actually, I wouldn't write all of it, so I'm giving added information and interest.

I do think it is important to journal. I've written a little information or just a thought or comment under most of the pictures.

If you are looking at this, and you have never put together an album, I want you to know that it doesn't have to be hard. Also, you don't need a ton of stuff to do it with. Investing in a quality album is the first thing. It will be kinder to your photos in the long run and not fall apart. A corner rounder to snip off those photo corners, a tool to crop (cut away) parts of the picture that aren't necessary, adhesive, and a good acid free journaling pen will put you on the right track.

Tuesday, July 15, 2008

My Mess

This is my mess, and it's going to get worse. I dug out my Creative Memories 12 x 12 true album, and I'm putting all those pictures from my trip to Michigan into it. I journal as I go and have finished day three of eleven days. I'm going to have to kick back for a few minutes and let my mind and body recover. Don't get me wrong, I really like doing this. I'll love the results and will have a wonderful book to let me relive my most excellent vacation.

As you can see, there is NO hope of any card making going on for a bit. It is going to take a few days to finish my project here. They will be days well spent.

I'm glad Daughter I-Needa impressed upon me the importance of preserving photos in quality acid free, lignin free, and buffered albums. It is a lot of work to put pictures together, and I would rather spend a little more now and get quality merchandise. I'm sad at some of my mother's photos that were ruined by being placed in organizing photo albums that virtually destroyed the pictures.

I had a drawer full of family photos when I-Needa first took me under her Creative Memories Consultant wings. She showed me the error of my ways and set me on the straight path.

Unfortunately, the consultant path became too much for her as her teaching career was just too time consuming to tackle an additional activity. I do have a wonderful consultant, and she is always encouraging me.

I seem to be rattling on a bit, but it is due to something tired in my brain. I'll leave you with the picture of my mess. Just know that I'm busy being creative!

Monday, July 14, 2008

Garden Whimsy

I will confess right off the bat that I didn't make this card recently. I'm just desperate for something to put on my crafting blog. Oh... my. I probably shouldn't admit that, but it is true. One must be truthful. I've been running and doing other things, but felt that tug in my brain that said I needed to put a card on my blog.

One of the first stamp sets that I purchased was Stampin Up's Garden Whimsy. I've loved this stamp set! It is, as the name implied, a fun lighthearted set.


I remind you that I've only been playing with stamping for about a year and a half now. I made this card before purchasing all the Stampin Up papers. This is some nice card stock from Hobby Lobby and some inks from my Marvy markers.

Hopefully, I will have some nice new cards soon. I plan on asking my friend P.R. to come for a short vacation and spend a little time making cards together. I'll take lots of pictures.

In the meantime, I'm off to get out my Creative Memories album and work on putting all those Mackinac Island pictures into story order.

Sunday, July 13, 2008

Stamping Brenda's Dream Room

While visiting I-Needa, we were treated to an on site visit of the house that Stamping Brenda and her husband will soon call their new home.

Brenda is a crafter deluxe. She has a room in their home for her crafts, and her husband really felt she needed something special in their new home that will be a dedicated craft room. Oh... doesn't that make you feel the love for hubby?

I had stepped into this in progress room and just had to snap a picture. Stamping Brenda is looking around a bit while I-Needa looks out the window... possibly in prayer for a similar stamping room. Just kidding.
Please note a closet with shelving. There's lots of space there.


Then there will be lovely built in cabinets. Again... this is a craft room. Stamping Brenda has tons of stamps, inks, papers, tools. You name it, Brenda probably has it.

Of course, you are going to want to see the finished product one of these days when Brenda is moved into her house and has the new room readied for crafting. It may be the first room she unpacks. There will be a large table in the middle of the room, and who knows what else. I'll definitely head back and take more pictures.


Stamping Brenda has been a dedicated card crafter and album maker for many years. She is always doing something to help raise funds for worthy causes with her craft. I can't think of anyone who better deserves such a nice room for her toys. Besides, Stamping Brenda is just plain nice.

In the meantime, I can go dig in my closet and try to find what I'm looking for. I'm trying to keep things organized as I add to my little crafting collection, but I can certainly see the joy of having this really nice place to play.

Friday, July 11, 2008

Cuttlebug Question

I was tickled the other day to have a question posted on my website. Woo hoo... a visitor to my tiny blog. What fun... someone left a comment and question.

The question: How did you manage to emboss with the Cuttlebug and not leave a line?

It was one of the smaller Cuttlebug folders. I have to confess that when I enlarged the picture from A Little Big of Happiness and took a really close look, there is a very faint line left by the edge of the folder as it went through the Cuttlebug. Oh, my.

I decided to try some different weights of paper to see if it made a difference. I put a sample of my SU paper though and could see a fine line at the top only.

Then I got out some paper that came from Hobby Lobby. It isn't as heavy as the SU paper. I did get a very very faint line there also. I had to hold it around in the light to really see it. If I hadn't been looking for it, I'm not sure I would have noticed at all.

My visitor, The Crooked Stamper said she has put her Cuttlebug away. For that, I am sad.

Thursday, July 10, 2008

Whine

I'm waiting for the new Stampin Up catalog. Last time I found myself with the crowd that was almost beside themselves with anticipation. I decided to cool it and be sensible. Uh huh.

I keep hoping that they will get some 'cute' animal stamps. I would love to see some hedgehogs, bunnies, ducks, etc. SU has lots of lovely flowers and other items, but I do hope that one of these days they will include well detailed animals.

I've been looking around and am close to ordering some cute Penny Black hedgehogs and bunnies. The Penny Black website doesn't have sales online yet, but I've found them at
Addicted To Scrapbooking, and I'm going to have some soon.... TAH DAH!

Wednesday, July 9, 2008

I-Needa's Card Class 3

I'm glad I-Needa has been making cards. It will give me some needed inspiration.

I really like the simplicity of this card. I was immediately attracted to the use of the Cuttlebug polka dot background as well. I'm not sure how anyone lives and makes cards without the Cuttlebug.

The sentiment is from SU's Sincere Salutations, which happens to be the first stamps I purchased. I'm only a year into this whole card making adventure.

The flowers are from SU's Close As a Memory. With a touch of ribbon for texture and accent, this makes a nice little card.

Tuesday, July 8, 2008

I-Needa Went to Card Class 2

This is another card that I-Needa made at her recent card class. I ordered SU's star punches and think I'd best get with it and order SU's Classic Star wheel. I can definitely see this as a project for next Fourth of July!

The papers have got to be SU's Bold Brights in Real Red and Brilliant Blue.

The sentiment is from SU's Celebrate Everything

It makes me ready for more fireworks!

Monday, July 7, 2008

I-Needa Went to Card Class

I-Needa went to a card class not long ago and came home with five new cards. Her SU consultant is really on the ball and managed to keep everyone working and happy about it.

Normally, I'd give you a play by play of each item used on this card. I didn't manage to shake that information out of I-Needa, so am sitting here with my catty in hand and think I'll try to look some of it up. I so spot the wonderful corner punch. I ordered that not long ago and really like it.
I don't have the scallop circle punch, but that may come soon. I like the paper piercing around the edge.
The sentiment is from SU's All Holidays. I'm looking for the orange segments... I'm looking... looking... (I'm not having any luck finding the fruit item! It has got to be around somewhere. There is also that really pretty background. When I find out, I'll come back and let you know. In the meantime, just enjoy it.) UPDATE: My SU consultant just got online and told me that the stamp set is Tart and Tangy from the last mini catalog. Thank you, Crafting Ida!!

So much said for my detailed professional (I'm no professional) card making report.

Friday, July 4, 2008

A Little Bit of Happiness Friend Card

My friend, Donna, came over to make cards with me. That was the incentive I needed to get into that craft room and get busy. I really needed to make some cards, but have been busy with all kinds of things I've volunteered myself to do.

I dug out my SU hostess set 'A Little Bit of Happiness' and borrowed Donna's SU 'Sprinkles'. I used Bold Bright Gable Green for the background. I matched some quilling strips to Bold Bright Green Galore and used that for trim.

It will be in the mail soon to a friend. Also, I'll be ordering 'Sprinkles' as it works so well with the hostess set.

Friday, June 27, 2008

Album Making

If you've been on my Humor and Doings site, you know that I've been up to my eyebrows, almost literally, trying to get photographs from my recent trip to Michigan in order.

I decided not to print my own as I go. I ordered them... uploaded and waited for them to come in the mail. Lovely.

My crafting lately has been on the computer trying to load photos to Flickr and put them on my site. That has consumed a vast amount of time.

I do have all these pictures sorted and will soon be ready to start the album. I purchased a new True 12 x 12 album from my Creative Memories consultant, and I am ready to go.

I really believe in putting photos into something nice and telling the story. Let's face it, in time you can't remember the details. I like having a visual record to help me relive the trips I take. It is good to have fond memories.

Wednesday, May 28, 2008

Posted At Last

I was down to the wire today with finishing touches on cards. I've been busy doing other things and have let my card making go by the wayside for awhile.

The first card is for a friend and there will be a little gift certificate enclosed.

The recipe:
Stampin Up's Just Like You, Itty Bitty Backgrounds, and So Many Sayings. SU's Word Window punch is perfect for punching out that one little phrase from the So Many Sayings blocks. Also, the tag punch is great for a finished look on corners. I used Bold Bright paper and ink and added a touch of ribbon that I purchased at Hobby Lobby on half price.

I love carrying my paper samples with me as can get ribbon that really looks good with my Stampin Up papers.


A good friend is retiring from many years as an elementary school teacher. I wanted something cheerful to send her at the start of this next wonderful phase of her life.

Recipe:
Stampin Up's Just Like You set, Bold Bright paper and ink, and that nifty little tag punch for the corners. Again, I picked up ribbon from Hobby Lobby and a word stamp from Stampabilities.

I hope they like their cards.

Tuesday, May 6, 2008

No Fun

I seem to have been missing in action. I seem to find so many other things to do each day that card crafting has not been happening. I'm SORRY! I don't intend this to be a permanent state of my being. I plan on getting back to it and playing. Please forgive and come back again.

Tuesday, April 15, 2008

Gone, Gone, Gone

Last week our retired teachers' local group had an auction. Each year we do this to raise a little extra money. Many of the ladies bring wonderful fattening baked goods. I decided that I'd do something different, so had been working on most of the cards that I've posted lately to give as my donation to that auction.

I'm proud to say that the auction went well. I avoided the baked goods as am trying not to eat everything that will go straight to padding. I was very pleased with the sale of the ten cards that I took. They were bid as 'for each' items and the highest bidder took what they wanted at that price. The rest went to the second bidder. They raised far more than if I'd taken a baked item, and I was really pleased with the amount donated.

I came home and realized that all my new cards are gone, gone, gone. In some ways, it made me rather sad. I'm going to have to get busy soon and make new ones to replace those.

In the meantime, I've been working on a project taking digital pictures of really old family photographs. I'm planning on making a family history album and having it printed in hardback form. I put a little about that on my Humor and Doings blog. I think helping my friend with her scrapbook has jump started me back into this project. I have found that it is difficult to find enough hours in the day to do everything I need to do. Welcome to the world.

Thursday, April 10, 2008

A Little Help for a Friend

Something happened in my dining room yesterday. I'd promised to help a friend with creating an album of her mother's birthday celebration. It's amazing how hard it can be at times to just get going. I finally called Mary and we set a date for her to come. Yesterday was the day. I took this first photo after she had been working for awhile getting things organized. I believe she had run to the car for a Pepsi at this point, so her chair is obviously vacant. I also took the opportunity to quit working and grabbed the camera thinking of my blog. I think she also needs a picture for the end of her album, just to show how hard she worked on it.


Mary has returned and is again hard at work. She was so tickled with how this is going and has decided that she is really enjoying herself.

She has a ton of pictures. She purchased a Creative Memories Premiere Album with extra pages. We finished the first set of pages and started on the next set. I think she was surprised that I didn't expect to finish the whole album yesterday. I had to laugh about that.

She finally gathered up her album. It had been raining hard, and I was a bit alarmed about her carrying everything off in the rain. She just couldn't leave it at my house as wanted to take it home to admire her work. I sent her home with a few tools and pictures and album wrapped in a trash bag for protection. She looked eager to carry on with the project. I hope to see her and the album again soon.

It is a wonderful thing to capture life's little moments and use a little creativity to tell stories. I know that she is going to happily share her album over and over. Of course, she is taking it to her Mother to enjoy. I'm probably going to give her a call soon and check to make sure she is journaling. We talked about that a lot.

Tuesday, April 8, 2008

A Little Bit of Happiness


Using Stampin Up's set A Little Bit of Happiness, I decided to make something colorful. Markers are from SU's Bold Brights. A little ribbon purchased at Hobby Lobby during one of their half price sales and a touch of embossing with a Cuttlebug small folder and this is complete. It is blank for personalization.

Sunday, April 6, 2008

Viola

I've been madly trying to make some cards to include in an auction. Our retired teachers' group is having the annual fund raiser this week, so I've been busy.

I dug out my Stampin Up Viola set and made a new birthday card. I used some dotted paper that I'd picked up from good old Hobby Lobby. I also used my new SU photo corner punch to add some interest in the corners. I layered SU Soft Subtle colors. I think this guy is a cutie.

Flowers and Friends

I dug out my 2002 SU 'Flowers and Friends' set yesterday. Stampin Brenda sold this little set and wonderful Daughter I-Needa bought it for me. Thank you!!

I had purchased this paper from Hobby Lobby awhile ago and decided it would work well. I loved the fact that the dots on the paper are carried out in the stamps. Even the rustic feeling of the paper is carried out beautifully in the flowers. I used markers from SU's Earth Elements. I also used dimensionals to add some depth and interest.

I recently bought Stampin Up's photo corner punch and used the smaller of the corners for this card. I punched them on white card stock and used the dabber to color them to blend in with the paper. I rather like the effect.

Saturday, April 5, 2008

Saturday's Card


Today I've been messing around trying to find enlightenment to create a card. I finally finished this, but not without a lot of thinking and trying.

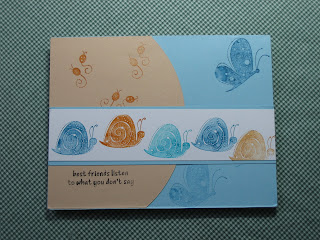
I started with some paper I'd found at Hobby Lobby. It's nice to have my paper samples on a ring to help match. Then I took some colors from SU's Soft Subtle collection and started working. The flower and snail are from SU's Whimsey. Love that set! I added some flower brads and a bit of ribbon. I ended up embossing the Thinking of You on white paper and dabbing on some ink for a little texture. I also like to edge my papers as think it looks more finished. I seem to use the heck out of SU's Ticket Corner Punch. I have a feeling that I'm going to try working this up again with some different papers.

Friday, April 4, 2008

Updating Flowers


I made this card previously, but dug it out and decided to add a bit to it. I darkened the orange framing around the flowers and added self adhesive rhinestones that I found in a cute new scrapbook store. I rather like the addition.

The flowers are Stampin Up's Sassy Stems, which is no longer in their catalog. Words are from So Many Sayings. I used SU's Word Window Punch, which works perfectly for these short phrases. I used SU's Ticket Corner Punch on the flower paper.

I also love the Cuttlebug and the texture embossing adds.

A New Birthday Card


At last I have a new card. I've been so bad, but am on the road to getting some crafting accomplished. I decided to take a picture of this before putting the front on it.

I used the Stampin Up Birthday Whimsy, some SU bold bright papers and ink and a bit of ribbon purchased from Hobby Lobby. The cute little elephant is an SU stamp from 2004. I used an SU Earth Element color for the cake as that seemed more natural. I'm not sure a bright green or yellow cake would do. =)


I decided to make another one, then realized that my lighter green paper was a tad too small. So, I got a larger white card and applied some paper I'd picked up from Hobby Lobby.
Tah Dah!

Saturday, March 29, 2008

Ashamed

I'm rather ashamed of myself for not posting here lately. I intended to do something every day. Then I realized that I have another life as well. That one is my real life, and I'm just not crafting every day. I've been outside pulling weeds and trying to get the yard ready. The green grass is poking through the golden colored grass, and I need to have my yard ready. I've been doing other things, but I WILL craft again soon and post something. I do appreciate your stopping by and feel a little bit like I've invited someone to dinner, then left the building. Sorry

Tuesday, March 25, 2008

Stamping Brenda's Embellishment Holder


Stamping Brenda has such good ideas for cute things to use in her crafting room. I just had to share a couple that she sent me today. Look at this cute cutlery tray that she has mounted on the wall to hold embellishments. Actually, she has two of them. It's simple, but it works and looks really nice.

Thank you for sharing, Brenda!!

Stamping Brenda's Wine Rack


Stamping Brenda sent me a picture of her cool new marker holder. One of her friends picked this up in Canton for five dollars. Brenda added some 30 oz. plastic tumblers from Walmart, and now has a nifty new holder. I just had to share!! Thanks, Stamping Brenda.

Friday, March 14, 2008

Anniversary Card


Juju offered up a request yesterday for an 60th Anniversary card for relatives. I woke up a couple of times last night trying to design something in my head. I decided I'd better get to work this morning, and this is the card I made.


Using Stampin Up's: Baroque Motifs, Soft Subtle Blush Blossom paper and ink, Whisper White pigment ink with white embossing powder, ticket corner punch. Happy Anniversary sentiment from Stampabilities. Ribbon is from good old Hobby Lobby. Also used EK Success corner punch for inside and Creative Memories decorative square punch.

I also like to take my SU pens to apply a little color to the edges of the punched papers. I had an embossing good time making this card.

JuJu was very pleased with it. Yea!